Most people connect their VPN, see "connected" in the app, and assume that's job done. Makes sense. But the app is only telling you it made a connection, not that everything behind it is working properly. It won't tell you whether your IP address actually changed, whether your DNS is quietly going through your real internet provider, or whether the kill switch would do anything if the VPN dropped. These four tests each take about 30 seconds, and together they give you the real picture.
Check 1: has your IP address actually changed?
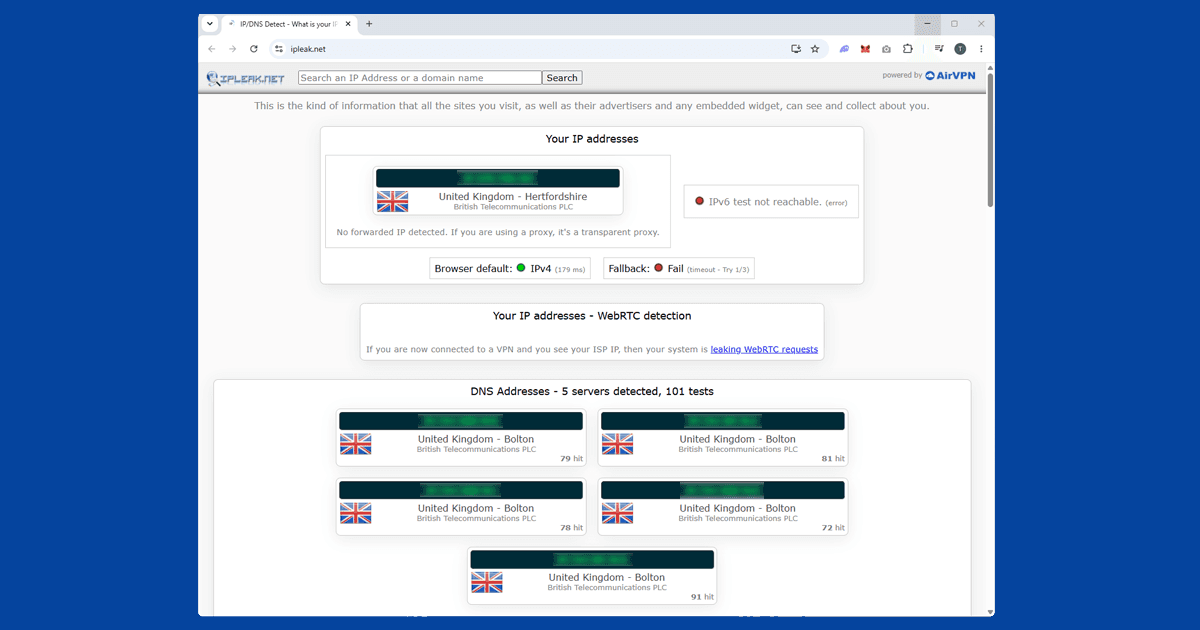
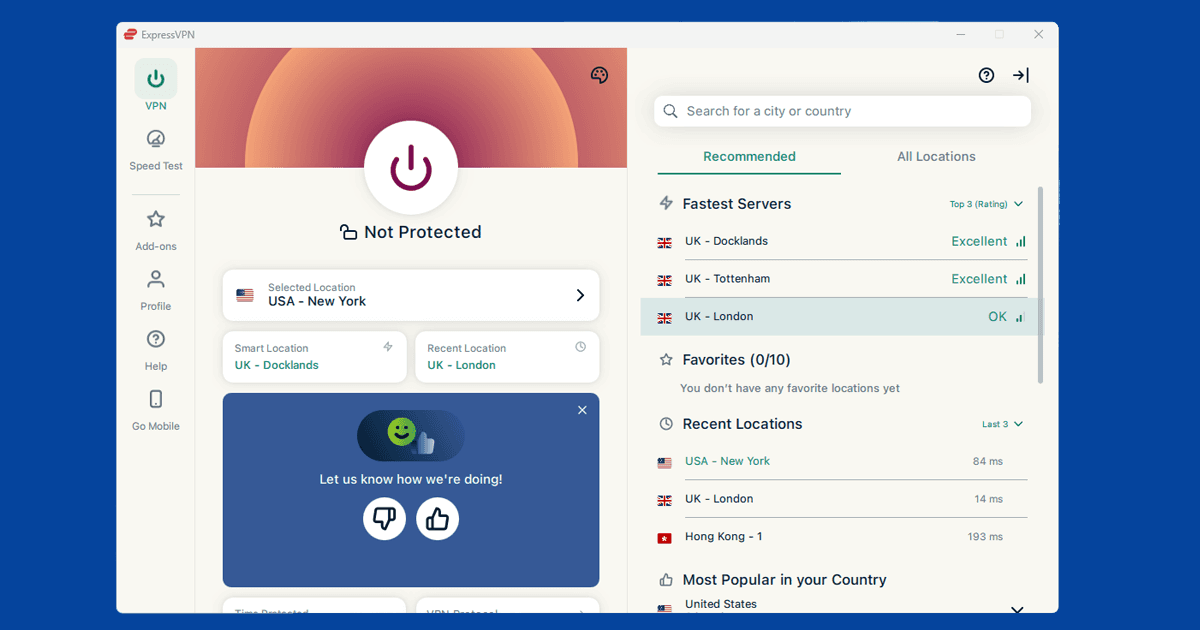
Open our IP address checker while the VPN is connected and take note of the country it shows. Then disconnect the VPN, refresh the page, and compare. Different country each time? Good, the VPN is working. Same country both times? Something isn't right.
If your IP isn't changing, try a different server and run the check again. Also give the VPN app a quick look, since some apps show a "connecting..." status that can easily be mistaken for "connected" at a glance. If it's still mid-connection, your IP won't have changed yet.
Check 2: is your DNS leaking?
DNS is what your device uses to translate website names into actual addresses. Think of it like a phone book: you type "google.com" and DNS looks up the right number. The problem is that even when your VPN is fully connected and your IP has changed, DNS lookups can slip past the VPN tunnel and go through your regular internet provider instead. That's a DNS leak, and it can expose your real location even when your IP looks perfectly fine.
With your VPN connected, go to dnsleaktest.com and run the standard test. It'll show you which DNS servers your device is actually using. If you see your internet provider's servers in your home country rather than servers in the VPN's country, you've got a leak.
DNS leaks are probably the most common reason a VPN looks like it's working but still fails to unblock content. Most apps have DNS leak protection built in, but on some it needs to be switched on manually. Have a look in your app settings for a DNS or privacy section. Our DNS leak fix guide covers NordVPN and ExpressVPN specifically.
DNS leaks are the thing people miss most often. The IP address check is the obvious one so everyone does it, but a VPN can show the right country on an IP check and still be leaking your real location through DNS. If you're having trouble unblocking a streaming service even though your IP looks correct, a DNS leak test should be the very next thing you run.

Check 3: does your kill switch actually work?
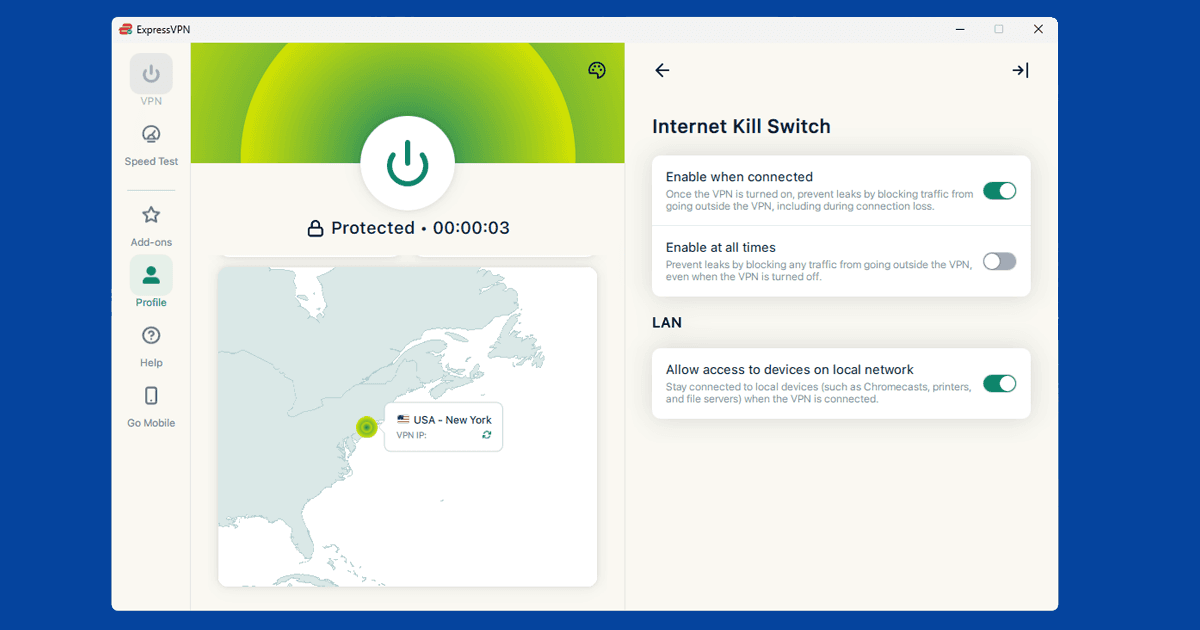
The kill switch cuts your internet completely if the VPN drops, so your real IP is never briefly exposed. The catch is that on most VPN apps it's off by default, so you have to go into settings and turn it on yourself before it'll do anything.
Once it's on, here's how to test it: with the VPN connected, manually disconnect it. Not pause, but fully disconnect. Your internet should go offline immediately. If you can still browse normally straight after disconnecting, the kill switch isn't doing its job.
In NordVPN, find it under Settings > Kill Switch. In ExpressVPN it's in the General section of your preferences or options (depending on your platform), listed as "Network Lock." Reconnect the VPN once you're done testing.
Check 4: are you leaking through WebRTC?
WebRTC is a browser feature built for video calls, screen sharing, and live chat. Handy, but it can sometimes leak your real IP address even when your VPN is running. It mainly affects browser extension VPNs rather than full system apps, but worth a quick check regardless.
With your VPN on, visit browserleaks.com/webrtc and see whether your real IP appears alongside the VPN's IP. If it does, your browser is leaking it through WebRTC.
The simplest fix is to use a full system VPN app rather than a browser extension, since the app covers everything on your device rather than just one browser. If you'd prefer to keep using an extension, Firefox lets you disable WebRTC: type about:config in the address bar, find media.peerconnection.enabled, and set it to false. Just know that doing this will also stop video calls like Google Meet from working in Firefox, so it's worth deciding whether that trade-off is worth it for you.